
World War 2 Project Ideas for Children
Check out these World War 2 project ideas for kids. Teach your children about this important era in a creative way.
World War 2 affected the entire world. How it came about, the changes it prompted and the cultural impact it had has been taught in schools ever since. World War 2 is a heavy topic that can be a lot to take in. There is a lot of historical information regarding countries coming together and forming alliances. Try engaging your children in these different World War 2 project ideas to make learning more fun!
While you’re here, check out these fun, free history printables!
1. Build an Air Raid or Anderson Shelter


What you’ll need:
- Cardboard
- Paper
- Glue
- Scissors
- Paint
- Small decorations
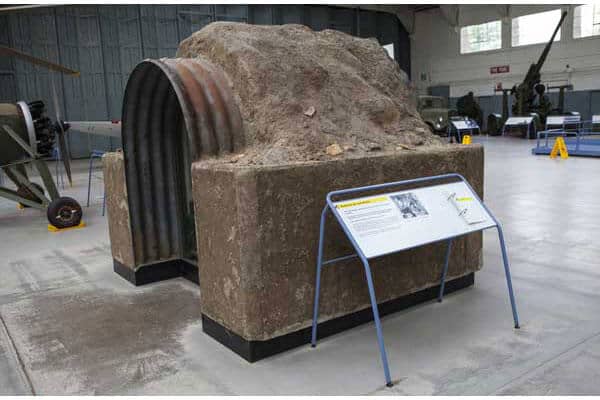
After showing your child pictures of Air Raid shelters, you can help them craft their own by cutting out cardboard, painting it and then decorating the shelter.
The shelter itself can be a bit tricky, but your best bet will be to create the front and back walls. Next use a piece of decorated paper to dome between the front and back, creating the half-cylinder look of the building. You can also talk to your child about the types of supplies that were kept there.
2. Make a Remembrance Poppy
Remembrance Day, a day all about remembering World War 2, is signified by poppies here

What you will need:
- Red cupcake liners
- Thin wooden sticks
- Glue
- Black marker
- Scissors
Flatten out one red cupcake liner for the outside of the poppy then cut another cupcake liner a bit smaller to glue inside. This will form the petals of your flower. From here, you can use your black marker to draw the seed pattern inside before glueing the flower head to a stem — thin wooden sticks coloured green work well for this — creating a little flower. These are simple and very cute.
Check out these Victorian Era project ideas!
3. World War 2 Project Ideas: Make Your Own Gas Masks


What you’ll need:
- Paper
- Pencil
- Scissors
- Toilet roll tube
- Tape
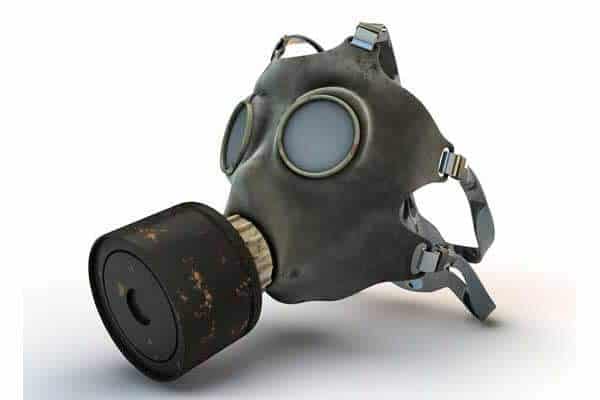
If you look at a World War 2 face mask, the first thing you’ll want to create is the cylinder for the pipe coming out of it. You can do this by taking a piece of paper, rolling it up, taping it together..
From there, you can let your child decorate a circle of paper, slightly larger than the end of your cylinder, to look like the ventilation for the mask. This can be taped onto the cylinder after it is decorated. Next you will need to make the face, which is essentially a giant heart that needs to be attached to the top of your cylinder — it should be big enough to cover your child’s face. You can then cut eye holes after attaching it to the cylinder. These eye holes will then be covered by toilet roll tubes, cut down to form much smaller circles. These masks look pretty funny in the end!
Subscribe to Mysteries in Time, and begin your history adventures. Sign up today and get free shipping!

